How to Install WordPress Manually or Automatically
Ready to launch your WordPress website but feeling lost about the setup? You’re not alone. Starting a site can seem tricky, but I’ve got you covered with a simple solution.
This guide makes installing WordPress on SiteGround a breeze, taking under 10 minutes with no coding needed. SiteGround offers speed, security, and beginner-friendly tools to streamline the process for bloggers, businesses, or hobbyists.
In 6 clear steps, I’ll show you how to get your site live, explore a manual installation for advanced users, and share must-have tips on themes, plugins, and SEO to make your site stand out.

Let’s dive in and get your WordPress site up and running today!
Contents
Understand WordPress and SiteGround Hosting
WordPress is the world’s most popular content management system (CMS) and powers approximately 43% of the web. It’s open-source, meaning it’s free to use, and perfect for creating anything from blogs to eCommerce stores. Not a coder? Not a problem. WordPress’s drag-and-drop editors and thousands of themes make it beginner-friendly.
You’ll need a fast hosting provider and for this guide I’ll be using SiteGround. They run on Google Cloud which means you get lightning-fast performance, free SSL for security, and the WordPress Starter plugin to simplify theme and plugin setup. Plus, their 24/7 WordPress support is very responsive. Let’s break down their options.
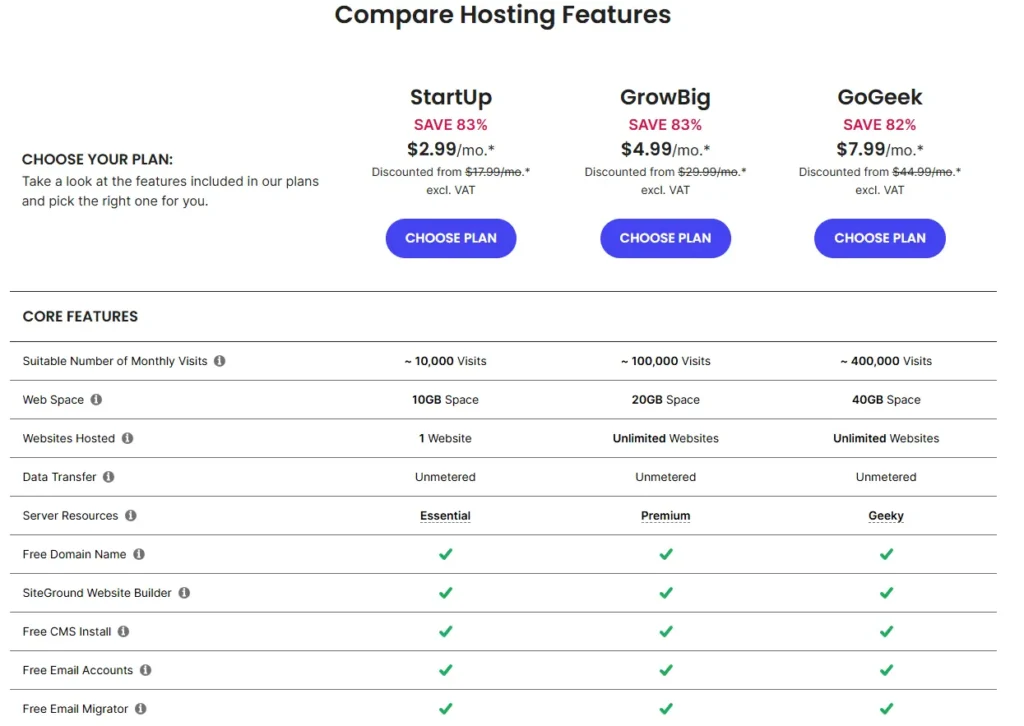
SiteGround has three main plans:
- StartUp is ideal for beginners with one website, offering 10 GB storage and essential features.
- GrowBig supports multiple sites and adds staging for testing changes.
- GoGeek is for advanced users needing more resources. For most new users, StartUp is the sweet spot.
You’ll also need a domain name, which is your site’s address (e.g., yoursite.com). SiteGround allows you to purchase a new domain, use an existing one, or start with a temporary subdomain, such as yoursite.sg-host.com.
Tip: Opt for domain privacy during signup. This hides your personal details from public WHOIS databases, protecting you from spam.
Here’s a quick comparison of their plans:
| Plan | Websites | Storage | Key Features | Best For |
|---|---|---|---|---|
| StartUp | 1 | 10 GB | Free SSL, daily backups, email | Beginners, single site |
| GrowBig | Unlimited | 20 GB | Staging, on-demand backups, caching | Multiple sites |
| GoGeek | Unlimited | 40 GB | White-label hosting, priority support | Developers, agencies |
Let’s sign up with SiteGround next.
Sign Up for SiteGround
Getting started with SiteGround is a breeze. Visit their website (siteground.com) and click “Start Now” to view their hosting plans. Choose the plan that fits your needs. StartUp is ideal for most beginners.
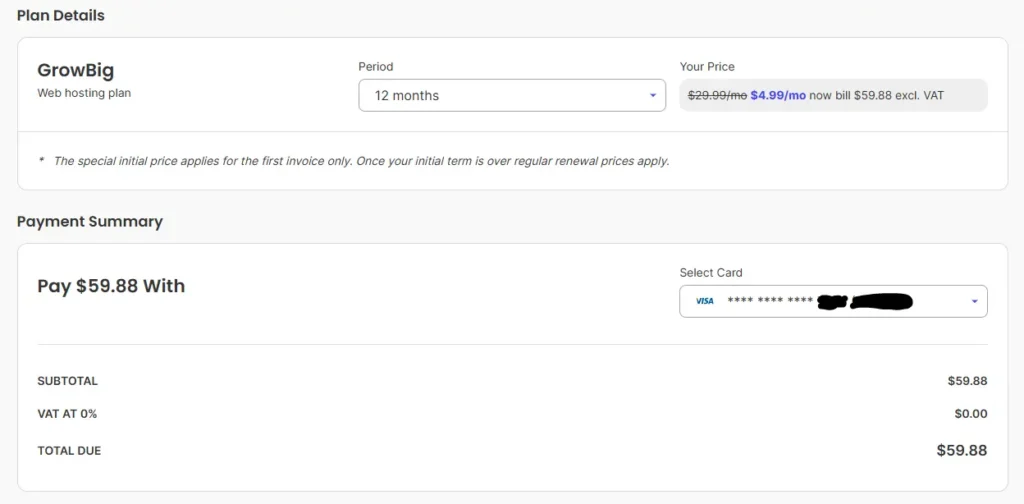
During signup, you’ll provide basic information: name, email, and payment details. They offer 1, 2, or 3-year contracts, with longer terms offering bigger discounts. You’ll see optional add-ons, like Site Scanner for malware protection. If you’re on a budget, you can skip these for now.
Next, select your domain. Your options are:
- Purchase a new domain: SiteGround’s prices start around $17/year.
- Use an existing domain: Enter the domain you already own.
- Use a temporary subdomain: Get a free address, such as yoursite.sg-host.com, to start.
If you’re using an existing domain not registered with SiteGround, you’ll need to update its nameservers to point to their servers. However they provide clear and simple instructions, these changes typically take 24-48 hours to propagate.
Once you complete the purchase, you’ll receive a confirmation email with login details for the SiteGround Client Area. This is your hub for managing hosting, domains, and WordPress.
Note: Store your login credentials securely. If you have a lot of password then a manager like Bitwarden can help.
With your account ready, it’s time to install WordPress!
Install WordPress Using the Website Setup Wizard
SiteGround’s Website Setup Wizard makes this process incredibly easy, even for first-timers. Let’s dive in.
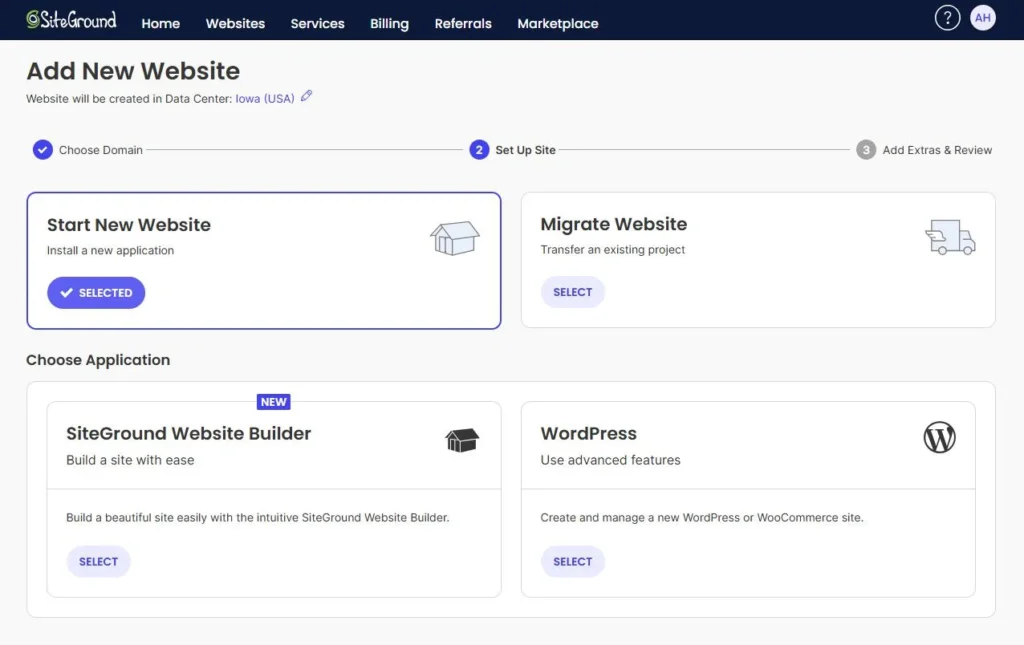
Log in to your SiteGround Client Area. Click Websites in the top menu, then select New Website. You’ll be prompted to choose a domain, either the one you picked during signup or a temporary subdomain.
Select Start New Website, then choose WordPress from the list of applications. This instructs SiteGround to set up WordPress for you.
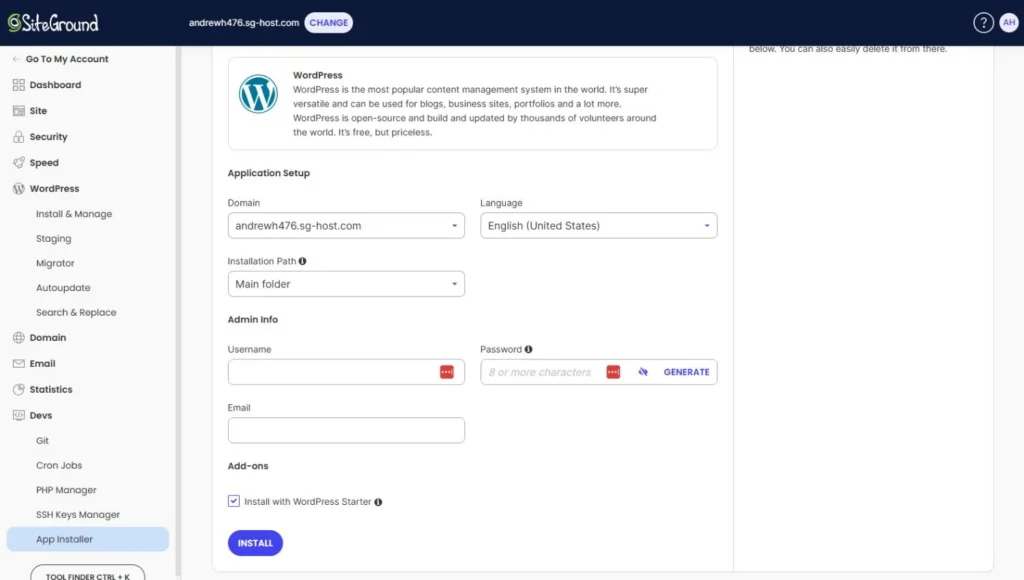
Next, enter your WordPress admin credentials:
- Username: Choose something unique and avoid using “admin” for better security.
- Password: Create a strong, random password with at least 12 characters, including letters, numbers, and symbols.
- Email: Use this for WordPress notifications and password resets.
Tip: Save these credentials in a password manager to keep them secure.
You’ll see an option to enable the WordPress Starter plugin. Check this box, as it simplifies picking a theme and essential plugins later, saving you time.
Click Continue, and the wizard takes care of everything: it installs WordPress files, creates a database, and configures your site. In 5-10 minutes, you’ll get a confirmation that your site is ready.
Your WordPress site is now live! However to give you more options, Next I’m going to explore other installation methods for flexibility.
Alternative Installation Methods
The Website Setup Wizard is the easiest way to install WordPress, but SiteGround offers other methods depending on your needs. Let’s explore three alternatives: Site Tools App Installer, Softaculous, and manual installation.
Site Tools > App Installer
If you prefer SiteGround’s modern dashboard, use the App Installer. Go to Site Tools (linked from your Client Area), then navigate to Dev > App Installer. Select WordPress, choose your domain, and set your admin credentials (username, password, email). You can also pick your language and enable multisite if needed. Click Install, and you’re done in minutes. This method is great for users comfortable with Site Tools.
Softaculous Auto-Installer (Legacy Plans)
If your account uses SiteGround’s older cPanel interface, Softaculous is your go-to. From cPanel, find Softaculous Apps Installer, click WordPress, and hit Install Now. Choose your protocol (HTTPS for security), domain, and admin credentials. Softaculous handles the rest, setting up files and databases automatically. This is quick but less common since SiteGround shifted to Site Tools.
Here’s how the methods compare:
| Method | Ease | Control | Time |
|---|---|---|---|
| Setup Wizard | High | Low | 5-10 mins |
| App Installer | High | Medium | 5-10 mins |
| Softaculous | High | Medium | 5-10 mins |
How to Manually Install WordPress
If you’re an advanced user or just want total control over your WordPress setup, manual installation is the way to go. Don’t worry if you’re new to this. This detailed guide walks you through every step, even if you’ve never touched a server before. It takes about 10-15 minutes but gives you flexibility for custom configurations. Let’s get started.
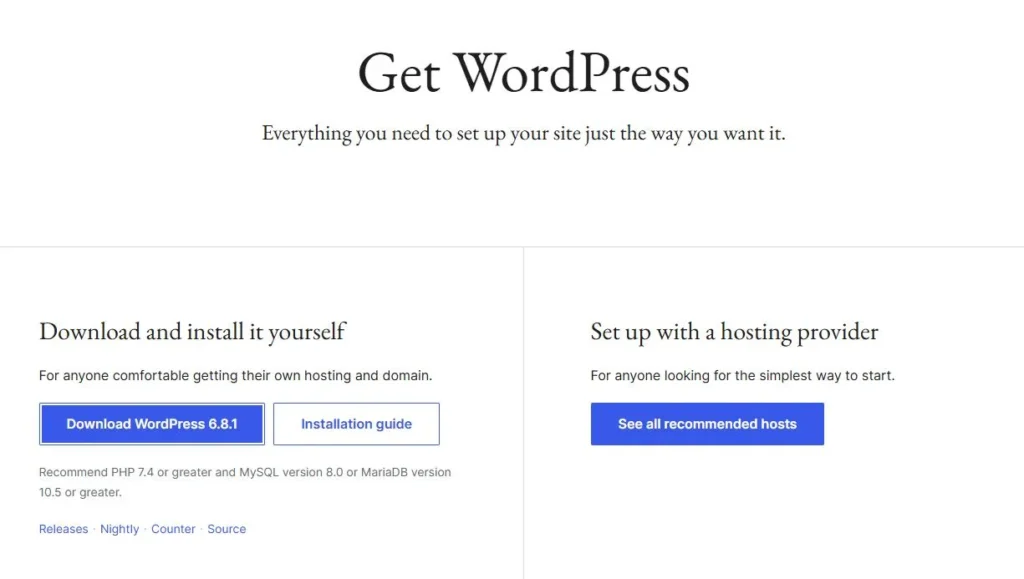
Step 1: Download WordPress
Visit wordpress.org and click Download WordPress to get the latest version (a .zip file). Save it to your computer. This file contains all the code needed to run WordPress. Unzip the file to access the wordpress folder, which you’ll upload later.
Tip: Ensure you’re downloading from wordpress.org (the official site), not wordpress.com, which is a hosted platform.
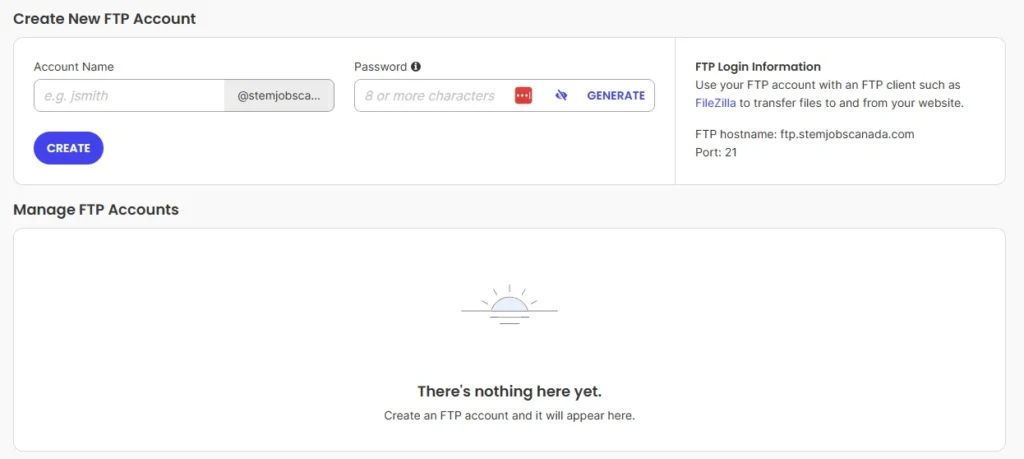
Step 2: Set Up an FTP Client
To upload WordPress files to your SiteGround server, you need an FTP (File Transfer Protocol) client. Download FileZilla, a free, beginner-friendly tool. Install it, then gather your FTP credentials from SiteGround:
- Log in to your SiteGround Client Area.
- Go to Site Tools > Site > FTP Accounts > Actions > FTP Credentials.
- Note the hostname (e.g., ftp.yourdomain.com), username, and password.
In FileZilla, enter these details in the Host, Username, and Password fields at the top, then click Quickconnect. You’ll see your server’s files on the right side.
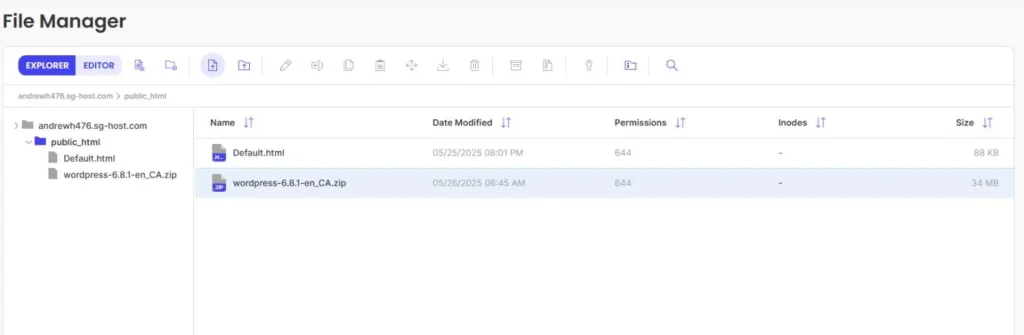
Step 3: Upload WordPress Files
In FileZilla, navigate to your server’s public_html folder on the right (this is where your site’s files live). If you want WordPress in a subfolder (e.g., yourdomain.com/blog), create a new folder inside public_html. On the left side, find the unzipped wordpress folder on your computer. Drag all its files (not the folder itself) to public_html or your subfolder. This upload may take 5-10 minutes.
Tip: If the upload fails, check your internet connection or reduce the number of simultaneous transfers in FileZilla’s settings.
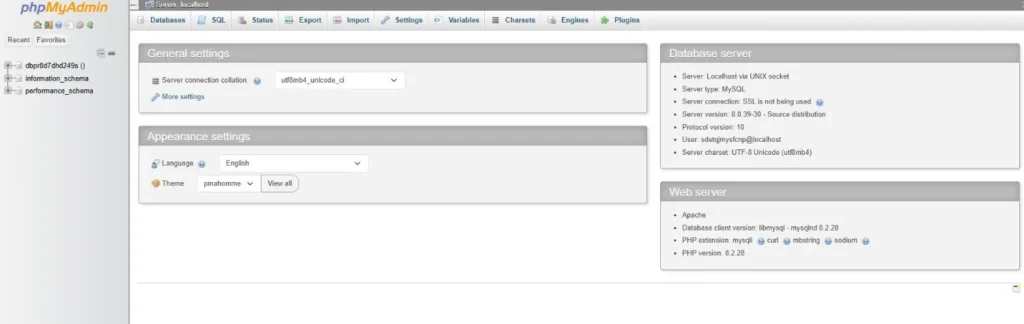
Step 4: Create a MySQL Database
WordPress stores your site’s content (posts, pages, settings) in a database. Create one in SiteGround:
- Go to Site Tools > Site > MySQL.
- Click Create Database, then Create User to make a database user with a strong password.
- Link the user to the database by selecting both in the Manage Databases section and clicking Add.
- Note the database name, username, password, and hostname (usually localhost).
Tip: Save these details in a password manager, as you’ll need them soon.
Step 5: Configure wp-config.php
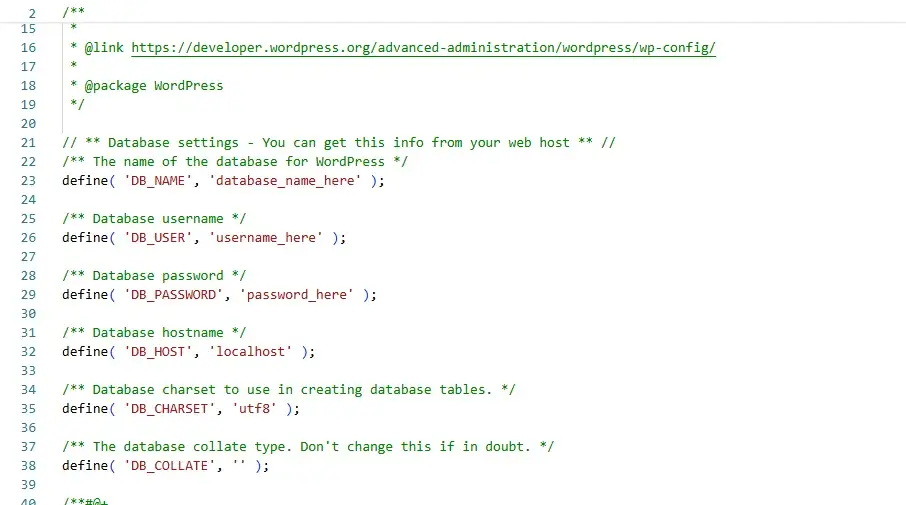
Back in FileZilla, find the wp-config-sample.php file in your uploaded WordPress files. Download it to your computer, rename it to wp-config.php, and open it in a text editor (like Notepad++ or VS Code). Update these lines with your database details:
define('DB_NAME', 'your_database_name');define('DB_USER', 'your_database_username');define('DB_PASSWORD', 'your_database_password');define('DB_HOST', 'your_database_hostname');
Save the file and upload it back to your server, overwriting the original wp-config-sample.php.
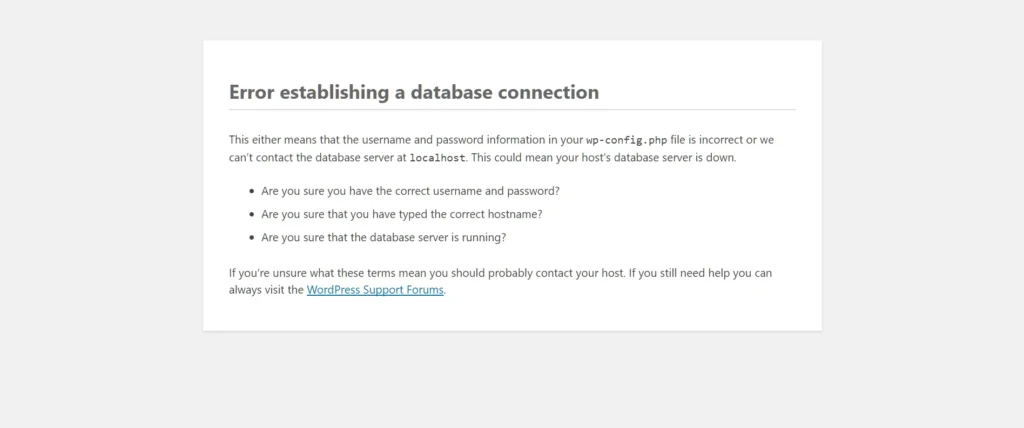
Troubleshooting: If you mistype these details, you’ll see an “Error establishing a database connection” later. Double-check your entries.
Step 6: Run the WordPress Installation
Open your browser and visit your domain (e.g., yourdomain.com or yourdomain.com/blog if you used a subfolder). If the files uploaded correctly, you’ll see the WordPress setup screen. Select your language, then enter:
- Site Title: Your site’s name (e.g., “My Blog”).
- Username: Choose a unique admin username (avoid “admin”).
- Password: Use a strong password.
- Email: For notifications and password resets.
Click Install WordPress. In a few seconds, you’ll get a success message. Log in at yourdomain.com/wp-admin using your credentials.

(Placeholder for Screenshot: WordPress setup screen or FileZilla interface)
Why Choose Manual Installation?
Manual setup lets you customize file locations, database settings, and more. It’s ideal for developers or anyone wanting a deeper understanding of WordPress.
Your site is now live! Next, let’s secure it with SSL.
Configure SSL and HTTPS for Security
Security is non-negotiable for any website. SiteGround makes it easy by automatically installing a free Let’s Encrypt SSL certificate for your domain, ensuring secure data transfer between your site and visitors.
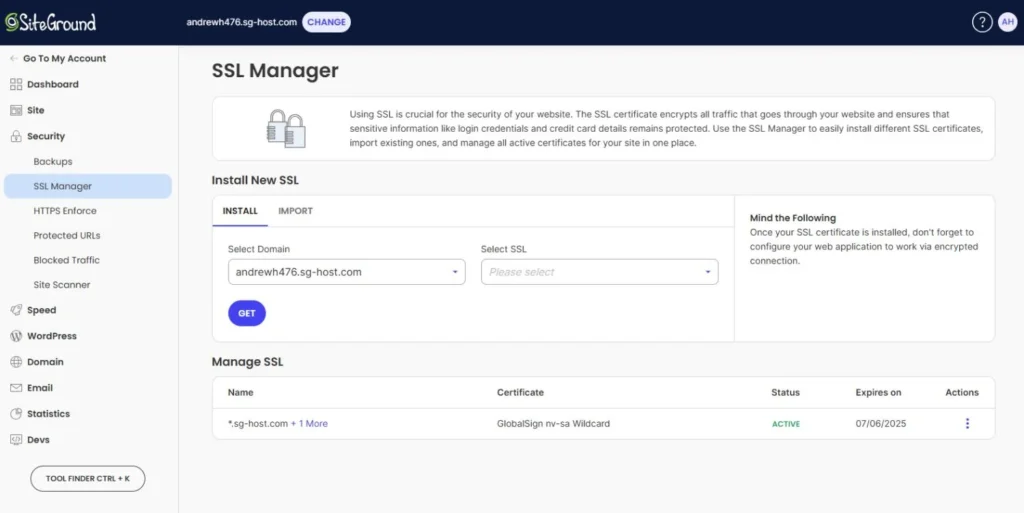
To verify your SSL, go to Site Tools > Security > SSL Manager.
You’ll see your domain listed with an active Let’s Encrypt certificate. If it’s not active yet, wait 5-10 minutes—propagation can take a moment.
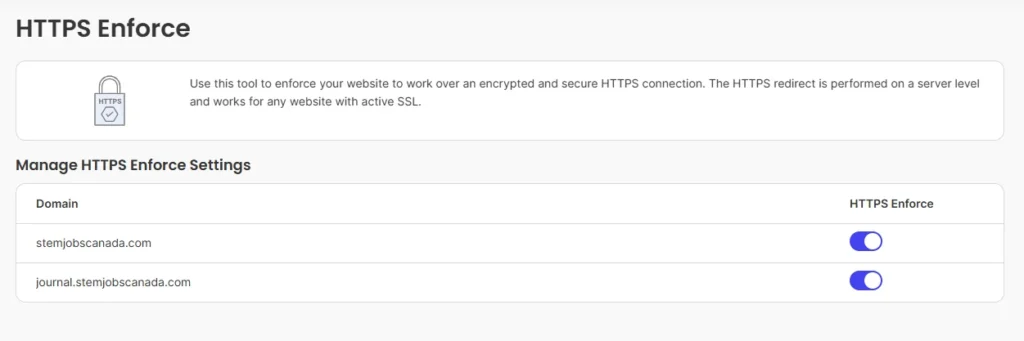
Next, enable HTTPS Enforce to redirect all HTTP traffic to HTTPS.
In Site Tools, navigate to Security > HTTPS Enforce and toggle it on for your domain. This ensures your site always loads securely, which is critical for user trust and SEO (Google ranks HTTPS sites higher).
Why does SSL matter?
It encrypts sensitive data (like login details or customer info), protects against hackers, and boosts your site’s credibility. A padlock icon in the browser confirms it’s working.
Troubleshooting: If your site doesn’t load with HTTPS, clear your browser cache or contact SiteGround’s 24/7 support. They’ll fix it fast.
With your site secure, it’s time to explore your WordPress dashboard and start customizing.
Log In and Customize Your WordPress Site
Your WordPress site is live—congrats! Now, let’s log in and make it your own. Visit yourdomain.com/wp-admin or click Log in Admin from the SiteGround Client Area. Enter the username and password you set during installation.
The WordPress dashboard is your control center. You’ll see sections like Posts (for blog content), Pages (for static content like “About”), Appearance (for themes), Plugins (for extra features), and Settings (for site configuration). It might look overwhelming, but let’s start simple.
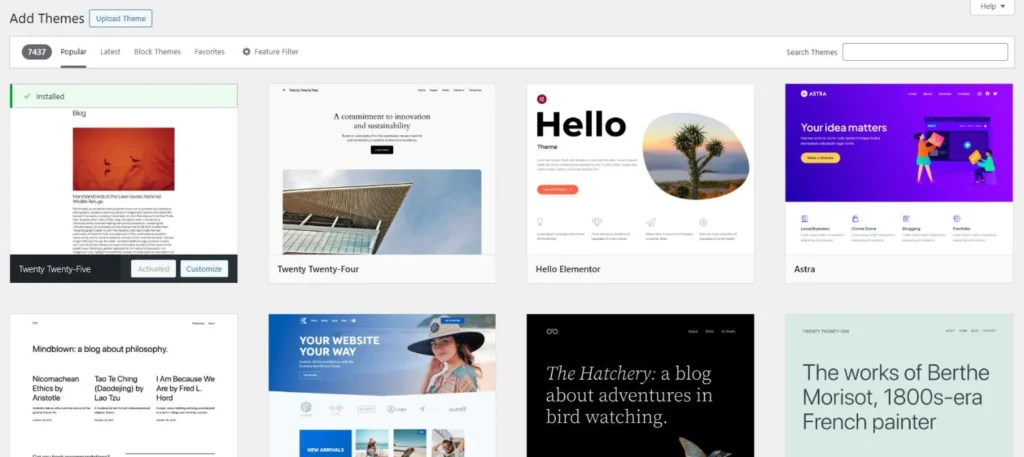
Step 1: Choose a Theme
A theme controls your site’s look. If you enabled the WordPress Starter plugin, it’ll suggest free themes like Astra or premium options like Divi. Alternatively, go to Appearance > Themes > Add New and search for a theme. Astra is lightweight and beginner-friendly; Divi offers advanced design flexibility. Install and activate your choice.
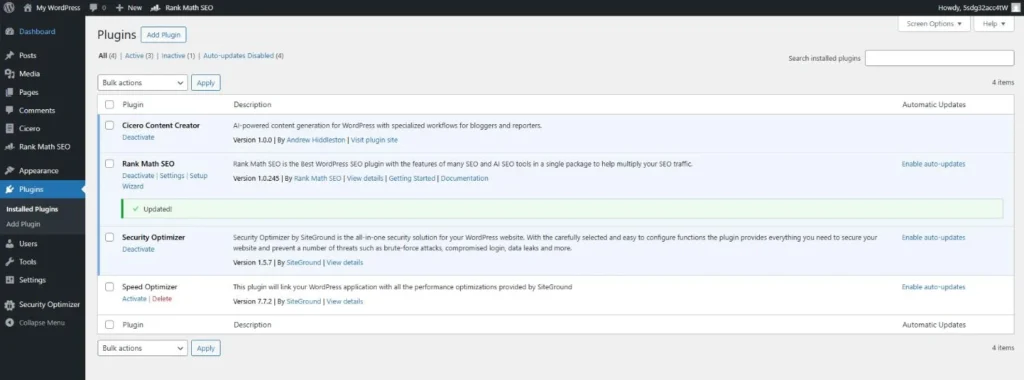
Step 2: Install Essential Plugins
Plugins add functionality. From the WordPress Starter or Plugins > Add New, install:
- SiteGround Security: Enhances protection (pre-installed on some plans).
- RankMath: Optimizes content for search engines.
- MonsterInsights: Tracks site analytics with Google Analytics.
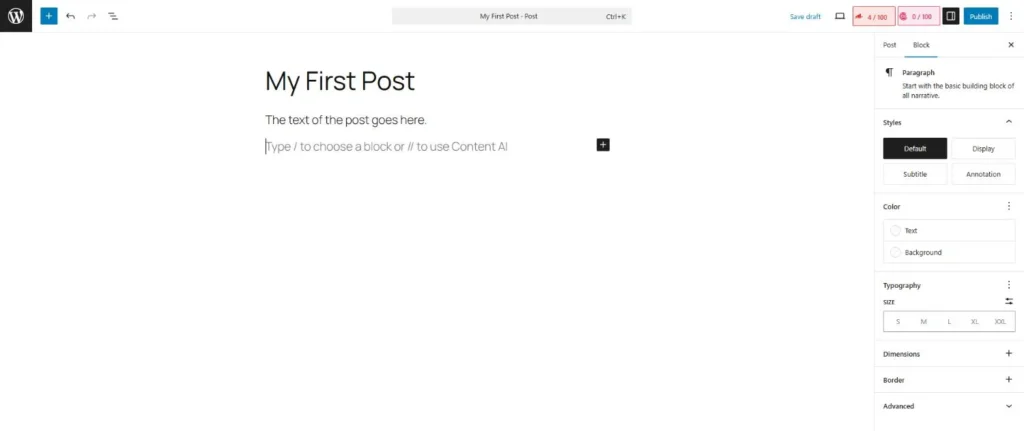
Step 3: Create a First Post or Page
Test your site by creating a blog post (Posts > Add New) or a homepage (Pages > Add New). Add a title, some text, and maybe an image. Click Publish to make it live.
Step 4: Configure Basic Settings
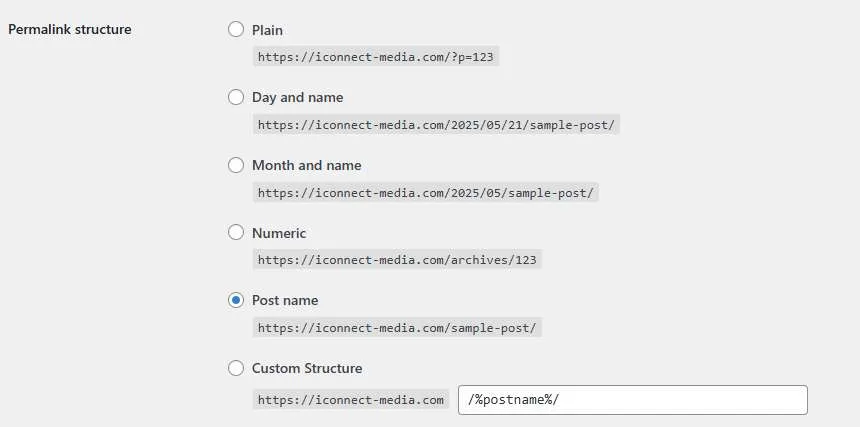
Go to Settings > General to set your site title (e.g., “My Blog”) and tagline (e.g., “Welcome to My World”). In Settings > Permalinks, choose “Post name” for SEO-friendly URLs (e.g., yourdomain.com/my-post).
Troubleshooting: Can’t log in? Double-check your credentials or reset your password via the login page’s “Lost your password?” link. If the dashboard is slow, clear your browser cache.
(Placeholder for Screenshots: WordPress dashboard, theme selection, plugin installation)
Your site is taking shape! Next, I’ll cover post-installation tips to polish it further.
Post-Installation Tips
Your WordPress site is live, and that’s a huge step forward. Now, let’s make it look professional, run smoothly, and attract visitors. Whether you’re a beginner, web consultant or a small business owner, these expanded tips will help you polish your site’s style, security, speed, and search rankings. Let’s dive into the next steps to ensure your site thrives.
Themes and Plugins: Craft Your Site’s Look and Features
A theme shapes your site’s appearance, from colors to layouts. Free themes like Astra are lightweight, fast, and ideal for beginners, offering simple customization through WordPress’s editor. Premium themes, like Divi (~$89/year), provide advanced drag-and-drop builders for unique designs. Start with Astra to keep things straightforward, then explore premium options as your skills grow.
Plugins add functionality, but too many can slow your site. Focus on these free essentials:
- RankMath: Optimizes your content for search engines with keyword tools and analytics.
- WPForms: Creates user-friendly contact forms to engage visitors.
- WP Fastest Cache: Create HTML versions of your pages to speed up loading time.
Limit yourself to 10 plugins to maintain speed. Before installing, check reviews on WordPress.org to ensure reliability. Always test plugins one at a time to avoid conflicts.
Tip: If a plugin causes issues, deactivate it via Appearance > Plugins or contact us for help.
SEO Basics: Get Found on Google
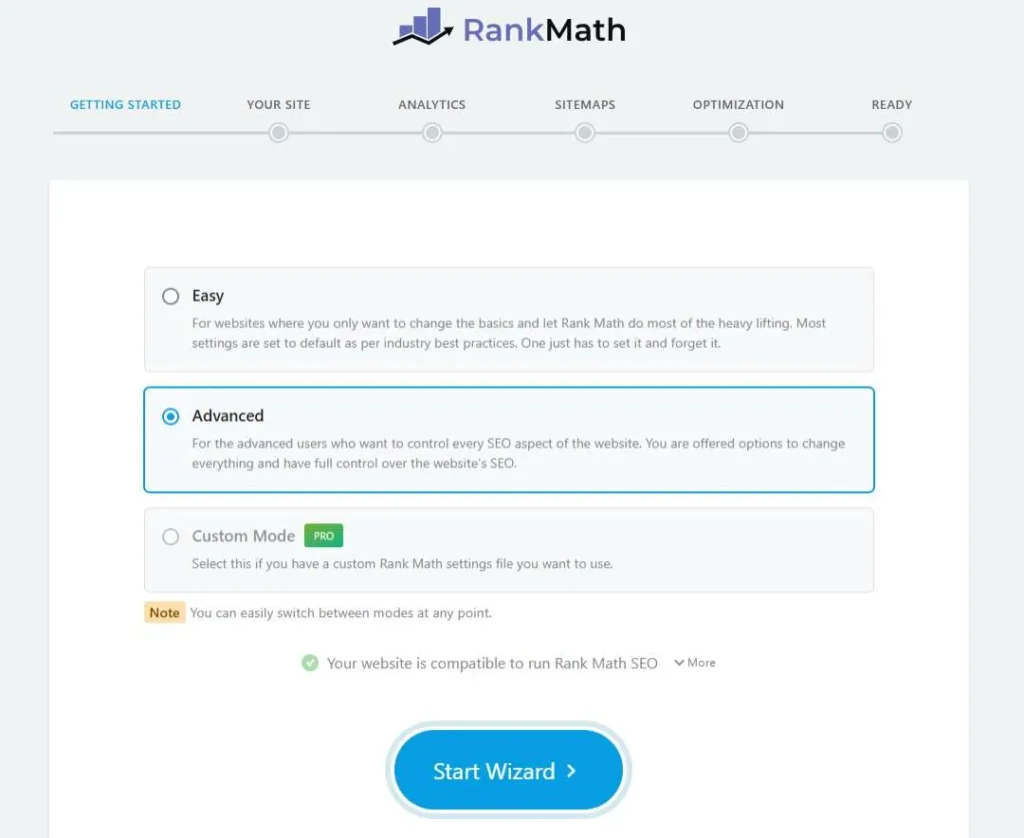
Want your site to appear in Google searches? Search engine optimization (SEO) is your key to visibility. Install RankMath, a powerful plugin that simplifies SEO for beginners. Here’s how to start:
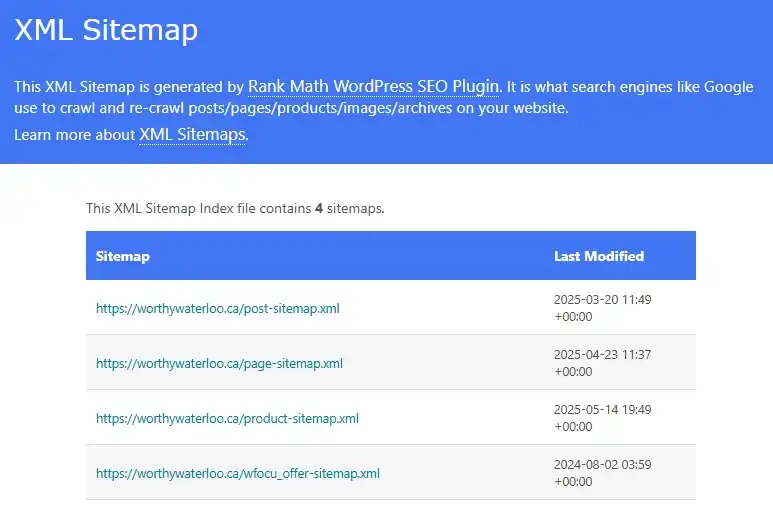
- Create an XML Sitemap: In RankMath’s dashboard, go to Settings > Sitemap and generate a sitemap, a file that helps Google discover your pages. Submit it via Google Search Console, a free tool. This ensures your site is indexed quickly.
- Write Keyword-Rich Content: Create blog posts targeting phrases your audience searches, like “best coffee shops in Chicago.” Use RankMath’s scoring tool to optimize your title, headers, and text for keywords.
- Optimize Meta Descriptions: Write short (150-160 character) summaries for each post in RankMath to entice clicks from search results.
SEO takes time, but consistent content builds rankings. For more, read our WordPress SEO guide for actionable strategies.
Backups and Security: Safeguard Your Hard Work
A single glitch can wipe out your site, but backups and security measures keep you protected. If you’re on SiteGround’s GrowBig or GoGeek plan, use Site Tools > Security > Backups to create on-demand backups. Schedule daily automatic backups for peace of mind. To restore a backup, select a date in Site Tools and follow the prompts—perfect for recovering after a crash.
For security, enable Site Scanner (a SiteGround add-on) to monitor for malware and hacking attempts. Keep your WordPress core, themes, and plugins updated via Dashboard > Updates to patch vulnerabilities. Use strong passwords for all accounts, stored in a password manager like LastPass.
Troubleshooting: If your site is hacked, contact support immediately. Our team can help with emergencies as well.

Performance Optimization: Keep Your Site Lightning-Fast
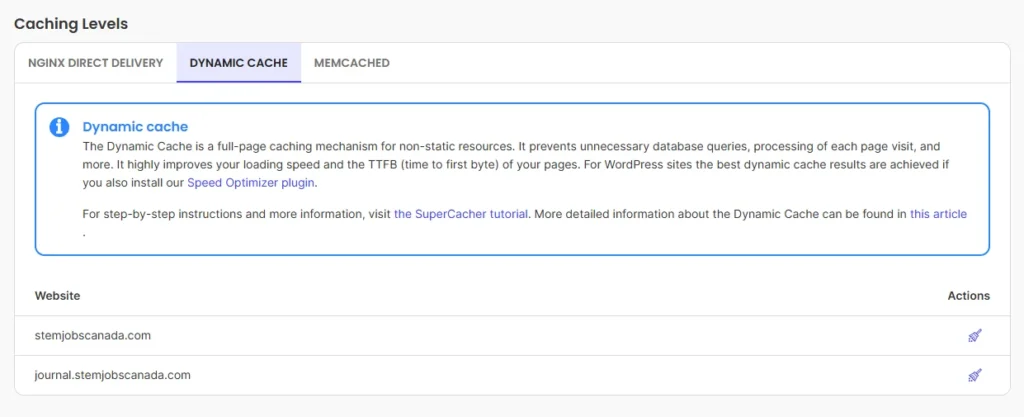
Slow sites drive visitors away. SiteGround’s tools make speed easy. Install the SG Optimizer plugin from Site Tools > WordPress > Install & Manage to enable caching, which stores page data for faster loading. In Site Tools > Speed > Caching, turn on Dynamic Caching and Memcached for a performance boost.
Ensure your site uses PHP 7.4 or higher for optimal speed. Check and update this in Site Tools > Dev > PHP Manager. Compress images before uploading with plugins like Smush, available on WordPress.org. Large images are a common cause of slow load times, so resize them to under 200 KB.
Tip: Test your site’s speed with Google PageSpeed Insights. Aim for a score above 80.

Learning Resources: Grow Your WordPress Skills
Feeling overwhelmed? You’re not alone, and there’s plenty of help out there. SiteGround’s WordPress tutorials cover everything from setup to advanced tweaks, perfect for beginners. The WordPress.org support forums offer community-driven solutions for any issue. For SEO, our WordPress SEO guide provides step-by-step tips to climb Google’s ranks.
Troubleshooting Common Issues
Most problems have quick fixes, and we’re here to help you solve them. From installation hiccups to blank screens, these steps will get your site running smoothly. Let’s dive into the most common issues beginners face.
Installation Fails
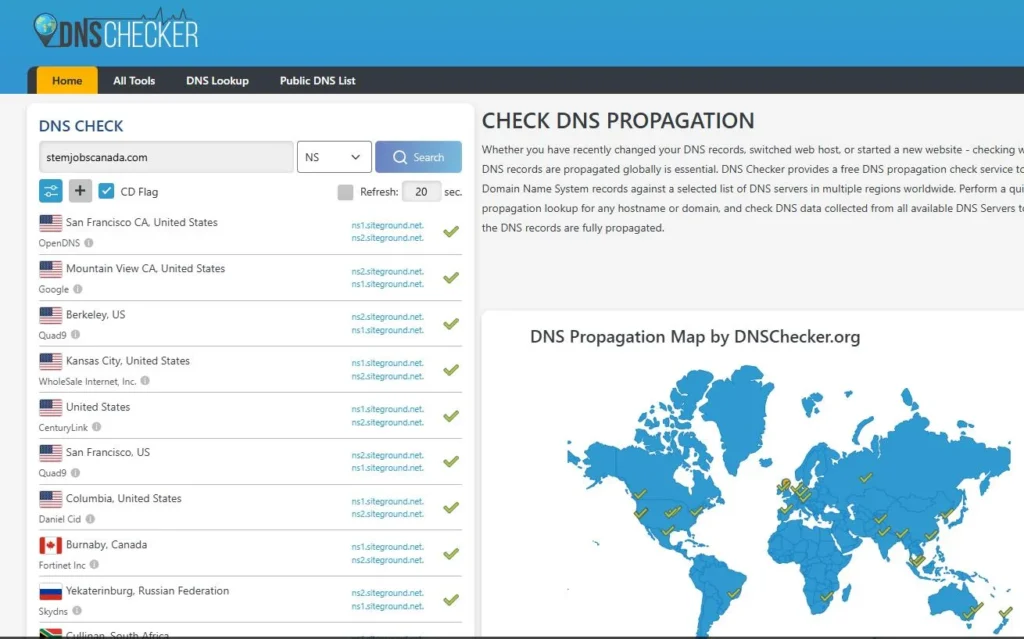
If WordPress doesn’t install, check domain propagation, the process where your domain’s DNS settings update to the new server. This can take 24 hours for new domains. Use dnschecker to verify nameservers (e.g., ns1.siteground.net). Confirm your admin credentials (username, password) are correct in SiteGround Client Area > Websites. If stuck, contact SiteGround’s 24/7 support via their Help Center. They’ll check server issues fast.
Tip: Ensure your domain is active at your registrar (e.g., GoDaddy).
SSL Not Active
No HTTPS padlock? Wait 5-10 minutes for SiteGround’s Let’s Encrypt SSL to activate. Clear your browser cache (stored website data) in Chrome with Ctrl+Shift+Delete. If it’s still off, go to Site Tools > Security > SSL Manager and reissue the certificate. Enable HTTPS Enforce in Site Tools > Security > HTTPS Enforce for secure loading. Test SSL at SSL Labs. If issues persist, SiteGround’s support can help via their portal.
Login Errors
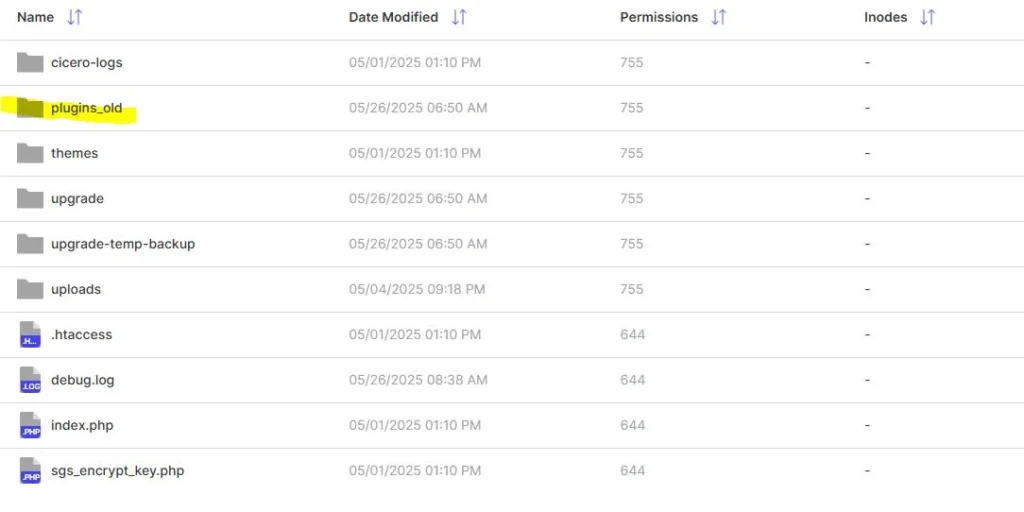
Can’t access yourdomain.com/wp-admin? Verify your case-sensitive username and password. Use the “Lost your password?” link to reset via email (check spam). Often a plugin conflict will be the issue. In FileZilla, connect using Site Tools > Site > FTP Accounts credentials, go to public_html/wp-content, and rename plugins to plugins_old. Try logging in. If it works, reactivate plugins one by one. See WordPress.org’s login guide for more help.
Slow Site
A sluggish site loses visitors. Set PHP to 8.1+ in Site Tools > Dev > PHP Manager for speed. Compress images with Smush or TinyPNG before uploading. Enable SG Optimizer caching in Site Tools > Speed > Caching > Dynamic Caching. Test performance at Google PageSpeed Insights (aim for 80+). If slow, SiteGround’s support can check server limits via their portal.
Tip: Limit plugins and avoid heavy themes.
White Screen of Death
Seeing a blank screen? This “White Screen of Death” often stems from plugin or theme conflicts. Use FileZilla to rename public_html/wp-content/plugins to plugins_old and themes to themes_old. Reload your site. If it loads, reactivate plugins/themes one by one to find the issue. To boost memory, go to Site Tools > Site > File Manager, edit public_html/wp-config.php, and add define('WP_MEMORY_LIMIT', '512M'); before /* That’s all, stop editing! */. Save and reload.
Database Connection Errors
Getting “Error establishing a database connection”? This happens in manual installs if wp-config.php has wrong database details. In FileZilla, open public_html/wp-config.php and verify:
DB_NAME(database name)DB_USER(database username)DB_PASSWORD(password)DB_HOST(usually localhost)
Find these in Site Tools > Site > MySQL. Correct any errors and save. If unsure, SiteGround’s support can assist via their Help Center.
Your Next Steps
Congratulations! You’ve just installed WordPress on SiteGround.
With their speed, security, and beginner-friendly tools, you’re ready to create a blog, business site, or online store in no time. The steps I covered, from signing up to customizing your site, make it easy to get started, even with zero tech experience.
If building a professional, high-performing website feels overwhelming or you want to save time, we’re here to help. Our team build will build a custom site tailored to your vision, from design to functionality. Whether you need a sleek portfolio, an eCommerce powerhouse, local SEO, or urgent emergency fixes, we’ve got you covered. Head over to our contact page to discuss your project and tell us what we can do to help.